Welcome to the Chocolatey Community Package Repository! The packages found in this section of the site are provided, maintained, and moderated by the community.
Moderation
Every version of each package undergoes a rigorous moderation process before it goes live that typically includes:
- Security, consistency, and quality checking
- Installation testing
- Virus checking through VirusTotal
- Human moderators who give final review and sign off
More detail at Security and Moderation.
Organizational Use
If you are an organization using Chocolatey, we want your experience to be fully reliable. Due to the nature of this publicly offered repository, reliability cannot be guaranteed. Packages offered here are subject to distribution rights, which means they may need to reach out further to the internet to the official locations to download files at runtime.
Fortunately, distribution rights do not apply for internal use. With any edition of Chocolatey (including the free open source edition), you can host your own packages and cache or internalize existing community packages.
Disclaimer
Your use of the packages on this site means you understand they are not supported or guaranteed in any way. Learn more...
-
STEP1
Package Review
-
STEP2
Integration Method
-
STEP3
Internal Repo Url
-
STEP4
Environment Setup
-
STEP5
Install Script
Step 1: Review Your Packages
Step 2: Choose Your Integration Method
Step 3: Enter Your Internal Repository Url
(this should look similar to https://community.chocolatey.org/api/v2/)
Step 3: Copy Your Script or Download Config
Option 1: Copy Script
Option 2: Download Config
Step 4: Setup Your Environment
1. Ensure you are set for organizational deployment
Please see the organizational deployment guide
2. Get the package into your environment
Option 1: Cached Package (Unreliable, Requires Internet - Same As Community)-
Open Source or Commercial:
- Proxy Repository - Create a proxy nuget repository on Nexus, Artifactory Pro, or a proxy Chocolatey repository on ProGet. Point your upstream to https://community.chocolatey.org/api/v2/. Packages cache on first access automatically. Make sure your choco clients are using your proxy repository as a source and NOT the default community repository. See source command for more information.
-
You can also just download the packages and push them to a repository
Download Packages
-
Open Source
-
Download the packages:
Download Packages - Follow manual internalization instructions
-
-
Package Internalizer (C4B)
-
Run: (additional options)
-
For package and dependencies run:
- Automate package internalization
-
Run: (additional options)
Step 5: Copy Your Script
See options you can pass to upgrade.
See best practices for scripting.
Add this to a PowerShell script or use a Batch script with tools and in places where you are calling directly to Chocolatey. If you are integrating, keep in mind enhanced exit codes.
If you do use a PowerShell script, use the following to ensure bad exit codes are shown as failures:
## 1. REQUIREMENTS ##
### Here are the requirements necessary to ensure this is successful.
### a. Internal/Private Cloud Repository Set Up ###
#### You'll need an internal/private cloud repository you can use. These are
#### generally really quick to set up and there are quite a few options.
#### Chocolatey Software recommends Nexus, Artifactory Pro, or ProGet as they
#### are repository servers and will give you the ability to manage multiple
#### repositories and types from one server installation.
### b. Download Chocolatey Package and Put on Internal Repository ###
#### You need to have downloaded the Chocolatey package as well.
#### Please see https://chocolatey.org/install#organization
### c. Other Requirements ###
#### We initialize a few things that are needed by this script - there are no other requirements.
$ErrorActionPreference = "Stop"
#### Set TLS 1.2 (3072) as that is the minimum required by various up-to-date repositories.
#### Use integers because the enumeration value for TLS 1.2 won't exist
#### in .NET 4.0, even though they are addressable if .NET 4.5+ is
#### installed (.NET 4.5 is an in-place upgrade).
[System.Net.ServicePointManager]::SecurityProtocol = [System.Net.ServicePointManager]::SecurityProtocol -bor 3072
#### We use this variable for future REST calls.
$RequestArguments = @{
UseBasicParsing = $true
}
## 2. TOP LEVEL VARIABLES ##
### a. Your internal repository url (the main one). ###
#### Should be similar to what you see when you browse
#### to https://community.chocolatey.org/api/v2/
$NugetRepositoryUrl = "INTERNAL REPO URL"
### b. Internal Repository Credential ###
#### If required, add the repository access credential here
# $NugetRepositoryCredential = [PSCredential]::new(
# "username",
# ("password" | ConvertTo-SecureString -AsPlainText -Force)
# )
# $RequestArguments.Credential = $NugetRepositoryCredential
### c. Chocolatey nupkg download url ###
#### This url should result in an immediate download when you navigate to it
$ChocolateyDownloadUrl = "$($NugetRepositoryUrl.TrimEnd('/'))/package/chocolatey.1.1.0.nupkg"
### d. Chocolatey Central Management (CCM) ###
#### If using CCM to manage Chocolatey, add the following:
#### i. Endpoint URL for CCM
# $ChocolateyCentralManagementUrl = "https://chocolatey-central-management:24020/ChocolateyManagementService"
#### ii. If using a Client Salt, add it here
# $ChocolateyCentralManagementClientSalt = "clientsalt"
#### iii. If using a Service Salt, add it here
# $ChocolateyCentralManagementServiceSalt = "servicesalt"
## 3. ENSURE CHOCOLATEY IS INSTALLED ##
### Ensure Chocolatey is installed from your internal repository
#### Download the Nupkg, appending .zip to the filename to handle archive cmdlet limitations
if (-not (Get-Command choco.exe -ErrorAction SilentlyContinue)) {
$TempDirectory = Join-Path $env:Temp "chocolateyInstall"
if (-not (Test-Path $TempDirectory -PathType Container)) {
$null = New-Item -Path $TempDirectory -ItemType Directory
}
$DownloadedNupkg = Join-Path $TempDirectory "$(Split-Path $ChocolateyDownloadUrl -Leaf).zip"
Invoke-WebRequest -Uri $ChocolateyDownloadUrl -OutFile $DownloadedNupkg @RequestArguments
#### Extract the Nupkg, and run the chocolateyInstall script
if (Get-Command Microsoft.PowerShell.Archive\Expand-Archive -ErrorAction SilentlyContinue) {
Microsoft.PowerShell.Archive\Expand-Archive -Path $DownloadedNupkg -DestinationPath $TempDirectory -Force
} else {
# PowerShell versions <4.0 do not have this function available
try {
$shellApplication = New-Object -ComObject Shell.Application
$zipPackage = $shellApplication.NameSpace($DownloadedNupkg)
$destinationFolder = $shellApplication.NameSpace($TempDirectory)
$destinationFolder.CopyHere($zipPackage.Items(), 0x10)
} catch {
Write-Warning "Unable to unzip package using built-in compression."
throw $_
}
}
& $(Join-Path $TempDirectory "tools\chocolateyInstall.ps1")
}
if (-not (Get-Command choco.exe -ErrorAction SilentlyContinue)) {
refreshenv
}
## 4. CONFIGURE CHOCOLATEY BASELINE ##
### a. FIPS Feature ###
#### If you need FIPS compliance - make this the first thing you configure
#### before you do any additional configuration or package installations
# choco feature enable -n useFipsCompliantChecksums
### b. Apply Recommended Configuration ###
#### Move cache location so Chocolatey is very deterministic about
#### cleaning up temporary data and the location is secured to admins
choco config set --name cacheLocation --value C:\ProgramData\chocolatey\cache
#### Increase timeout to at least 4 hours
choco config set --name commandExecutionTimeoutSeconds --value 14400
#### Turn off download progress when running choco through integrations
choco feature disable --name showDownloadProgress
### c. Sources ###
#### Remove the default community package repository source
choco source list --limitoutput | ConvertFrom-Csv -Header 'Name', 'Location' -Delimiter '|' | ForEach-Object {
if ($_.Location -eq 'https://community.chocolatey.org/api/v2/') {
choco source remove -n $_.Name
}
}
#### Add internal default sources
#### You could have multiple sources here, so we will provide an example
#### of one using the remote repo variable here
#### NOTE: This EXAMPLE may require changes
if ($NugetRepositoryCredential) {
choco source add --name ChocolateyInternal --source $NugetRepositoryUrl --user $NugetRepositoryCredential.UserName --password $NugetRepositoryCredential.GetNetworkCredential().Password --priority 1
} else {
choco source add --name ChocolateyInternal --source $NugetRepositoryUrl --priority 1
}
### b. Keep Chocolatey Up To Date ###
#### Keep chocolatey up to date based on your internal source
#### You control the upgrades based on when you push an updated version
#### to your internal repository.
#### Note the source here is to the OData feed, similar to what you see
#### when you browse to https://community.chocolatey.org/api/v2/
choco upgrade chocolatey --confirm
## 5. ENSURE CHOCOLATEY FOR BUSINESS ##
### If you don't have Chocolatey for Business (C4B), you'll want to remove from here down.
### a. Ensure The License File Is Installed ###
#### Create a license package using script from https://docs.chocolatey.org/en-us/how-tos/setup-offline-installation#exercise-4-create-a-package-for-the-license
choco install chocolatey-license --source $NugetRepositoryUrl --confirm
### b. Disable The Licensed Source ###
#### The licensed source cannot be removed, so it must be disabled.
#### This must occur after the license has been set by the license package.
if ("chocolatey-license" -in (choco list --localonly --limitoutput | ConvertFrom-Csv -Header "Name" -Delimiter "|").Name) {
choco source disable --name chocolatey.licensed
} else {
Write-Warning "Not disabling 'chocolatey.licensed' feed, as Chocolatey-License has not been installed."
}
### c. Ensure Chocolatey Licensed Extension ###
#### You will have downloaded the licensed extension to your internal repository
#### as you have disabled the licensed repository in step 5b.
#### Ensure the chocolatey.extension package (aka Chocolatey Licensed Extension)
if ("chocolatey-license" -in (choco list --localonly --limitoutput | ConvertFrom-Csv -Header "Name" -Delimiter "|").Name) {
choco install chocolatey.extension --source $NugetRepositoryUrl --confirm
} else {
Write-Warning "Not installing 'chocolatey.extension', as Chocolatey-License has not been installed."
}
#### The Chocolatey Licensed Extension unlocks all of the following, which also have configuration/feature items available with them. You may want to visit the feature pages to see what you might want to also enable:
#### - Package Builder - https://docs.chocolatey.org/en-us/features/paid/package-builder
#### - Package Internalizer - https://docs.chocolatey.org/en-us/features/paid/package-internalizer
#### - Package Synchronization (3 components) - https://docs.chocolatey.org/en-us/features/paid/package-synchronization
#### - Package Reducer - https://docs.chocolatey.org/en-us/features/paid/package-reducer
#### - Package Audit - https://docs.chocolatey.org/en-us/features/paid/package-audit
#### - Package Throttle - https://docs.chocolatey.org/en-us/features/paid/package-throttle
#### - CDN Cache Access - https://docs.chocolatey.org/en-us/features/paid/private-cdn
#### - Branding - https://docs.chocolatey.org/en-us/features/paid/branding
#### - Self-Service Anywhere (more components will need to be installed and additional configuration will need to be set) - https://docs.chocolatey.org/en-us/features/paid/self-service-anywhere
#### - Chocolatey Central Management (more components will need to be installed and additional configuration will need to be set) - https://docs.chocolatey.org/en-us/features/paid/chocolatey-central-management
#### - Other - https://docs.chocolatey.org/en-us/features/paid/
### d. Ensure Self-Service Anywhere ###
#### If you have desktop clients where users are not administrators, you may
#### to take advantage of deploying and configuring Self-Service anywhere
choco feature disable --name showNonElevatedWarnings
choco feature enable --name useBackgroundService
choco feature enable --name useBackgroundServiceWithNonAdministratorsOnly
choco feature enable --name allowBackgroundServiceUninstallsFromUserInstallsOnly
choco config set --name allowedBackgroundServiceCommands --value "install,upgrade,uninstall"
### e. Ensure Chocolatey Central Management ###
#### If you want to manage and report on endpoints, you can set up and configure
### Central Management. There are multiple portions to manage, so you'll see
### a section on agents here along with notes on how to configure the server
### side components.
if ($ChocolateyCentralManagementUrl) {
choco install chocolatey-agent --source $NugetRepositoryUrl --confirm
choco config set --name CentralManagementServiceUrl --value $ChocolateyCentralManagementUrl
if ($ChocolateyCentralManagementClientSalt) {
choco config set --name centralManagementClientCommunicationSaltAdditivePassword --value $ChocolateyCentralManagementClientSalt
}
if ($ChocolateyCentralManagementServiceSalt) {
choco config set --name centralManagementServiceCommunicationSaltAdditivePassword --value $ChocolateyCentralManagementServiceSalt
}
choco feature enable --name useChocolateyCentralManagement
choco feature enable --name useChocolateyCentralManagementDeployments
}
See docs at https://docs.ansible.com/ansible/latest/modules/win_chocolatey_module.html.
If Applicable - Chocolatey Configuration/Installation
## 1. REQUIREMENTS ##
### Here are the requirements necessary to ensure this is successful.
### a. Internal/Private Cloud Repository Set Up ###
#### You'll need an internal/private cloud repository you can use. These are
#### generally really quick to set up and there are quite a few options.
#### Chocolatey Software recommends Nexus, Artifactory Pro, or ProGet as they
#### are repository servers and will give you the ability to manage multiple
#### repositories and types from one server installation.
### b. Download Chocolatey Package and Put on Internal Repository ###
#### You need to have downloaded the Chocolatey package as well.
#### Please see https://chocolatey.org/install#organization
### c. Other Requirements ###
#### i. chocolatey.chocolatey
##### You will require the chocolatey.chocolatey collection to be installed
##### on all machines using this playbook.
##### Please see https://github.com/chocolatey/chocolatey-ansible/#installing-the-collection-from-ansible-galaxy
- name: Install and Configure Chocolatey
hosts: all
## 2. TOP LEVEL VARIABLES ##
vars:
### a. Your internal repository url (the main one). ###
#### Should be similar to what you see when you browse
#### to https://community.chocolatey.org/api/v2/
nuget_repository_url: INTERNAL REPO URL
### b. Internal Repository Credential ###
#### If required, add the repository access credential here and
#### uncomment lines with source_username and source_password below
# nuget_repository_username: username
# nuget_repository_password: password
### c. Chocolatey Central Management (CCM) ###
#### If using CCM to manage Chocolatey, add the following:
#### i. Endpoint URL for CCM
# chocolatey_central_management_url: https://chocolatey-central-management:24020/ChocolateyManagementService
#### ii. If using a Client Salt, add it here
# chocolatey_central_management_client_salt: clientsalt
#### iii. If using a Service Salt, add it here
# chocolatey_central_management_service_salt: servicesalt
## 3. ENSURE CHOCOLATEY IS INSTALLED ##
### Ensure Chocolatey is installed from your internal repository
tasks:
- name: Install chocolatey
win_chocolatey:
name: chocolatey
source: {{ nuget_repository_url }}
# source_username: {{ nuget_repository_username }}
# source_password: {{ nuget_repository_password }}
## 4. CONFIGURE CHOCOLATEY BASELINE ##
### a. FIPS Feature ###
#### If you need FIPS compliance - make this the first thing you configure
#### before you do any additional configuration or package installations
# - name: Enable FIPS compliance
# win_chocolatey_feature:
# name: useFipsCompliantChecksums
# state: enabled
### b. Apply Recommended Configuration ###
#### Move cache location so Chocolatey is very deterministic about
#### cleaning up temporary data and the location is secured to admins
- name: Set the cache location
win_chocolatey_config:
name: cacheLocation
state: present
value: C:\ProgramData\chocolatey\cache
#### Increase timeout to at least 4 hours
- name: Set the command execution timeout
win_chocolatey_config:
name: commandExecutionTimeoutSeconds
state: present
value: 14400
#### Turn off download progress when running choco through integrations
- name: Disable showing download progress
win_chocolatey_feature:
name: showDownloadProgress
state: disabled
### c. Sources ###
#### Remove the default community package repository source
- name: Remove Chocolatey Community Repository
win_chocolatey_source:
name: chocolatey
state: absent
#### Add internal default sources
#### You could have multiple sources here, so we will provide an example
#### of one using the remote repo variable here
#### NOTE: This EXAMPLE may require changes
- name: Add Internal Repository
win_chocolatey_source:
name: ChocolateyInternal
state: present
source: {{ nuget_repository_url }}
# source_username: {{ nuget_repository_username }}
# source_password: {{ nuget_repository_password }}
priority: 1
### b. Keep Chocolatey Up To Date ###
#### Keep chocolatey up to date based on your internal source
#### You control the upgrades based on when you push an updated version
#### to your internal repository.
#### Note the source here is to the OData feed, similar to what you see
#### when you browse to https://community.chocolatey.org/api/v2/
- name: Upgrade Chocolatey
win_chocolatey:
name: chocolatey
state: latest
## 5. ENSURE CHOCOLATEY FOR BUSINESS ##
### If you don't have Chocolatey for Business (C4B), you'll want to remove from here down.
### a. Ensure The License File Is Installed ###
#### Create a license package using script from https://docs.chocolatey.org/en-us/how-tos/setup-offline-installation#exercise-4-create-a-package-for-the-license
- name: Install Chocolatey License
win_chocolatey:
name: chocolatey-license
source: ChocolateyInternal
state: latest
### b. Disable The Licensed Source ###
#### The licensed source cannot be removed, so it must be disabled.
#### This must occur after the license has been set by the license package.
- name: Disable Chocolatey Community Repository
win_chocolatey_source:
name: chocolatey.licensed
state: disabled
### c. Ensure Chocolatey Licensed Extension ###
#### You will have downloaded the licensed extension to your internal repository
#### as you have disabled the licensed repository in step 5b.
#### Ensure the chocolatey.extension package (aka Chocolatey Licensed Extension)
- name: Install Chocolatey Extension
win_chocolatey:
name: chocolatey.extension
source: ChocolateyInternal
state: latest
#### The Chocolatey Licensed Extension unlocks all of the following, which also have configuration/feature items available with them. You may want to visit the feature pages to see what you might want to also enable:
#### - Package Builder - https://docs.chocolatey.org/en-us/features/paid/package-builder
#### - Package Internalizer - https://docs.chocolatey.org/en-us/features/paid/package-internalizer
#### - Package Synchronization (3 components) - https://docs.chocolatey.org/en-us/features/paid/package-synchronization
#### - Package Reducer - https://docs.chocolatey.org/en-us/features/paid/package-reducer
#### - Package Audit - https://docs.chocolatey.org/en-us/features/paid/package-audit
#### - Package Throttle - https://docs.chocolatey.org/en-us/features/paid/package-throttle
#### - CDN Cache Access - https://docs.chocolatey.org/en-us/features/paid/private-cdn
#### - Branding - https://docs.chocolatey.org/en-us/features/paid/branding
#### - Self-Service Anywhere (more components will need to be installed and additional configuration will need to be set) - https://docs.chocolatey.org/en-us/features/paid/self-service-anywhere
#### - Chocolatey Central Management (more components will need to be installed and additional configuration will need to be set) - https://docs.chocolatey.org/en-us/features/paid/chocolatey-central-management
#### - Other - https://docs.chocolatey.org/en-us/features/paid/
### d. Ensure Self-Service Anywhere ###
#### If you have desktop clients where users are not administrators, you may
#### to take advantage of deploying and configuring Self-Service anywhere
- name: Hide not-elevated warnings
win_chocolatey_feature:
name: showNonElevatedWarnings
state: disabled
- name: Use background mode for self-service
win_chocolatey_feature:
name: useBackgroundService
state: enabled
- name: Use background service for non-admins
win_chocolatey_feature:
name: useBackgroundServiceWithNonAdministratorsOnly
state: enabled
- name: Allow background uninstallation for user installs
win_chocolatey_feature:
name: allowBackgroundServiceUninstallsFromUserInstallsOnly
state: enabled
- name: Set allowed background service commands
win_chocolatey_config:
name: backgroundServiceAllowedCommands
state: present
value: install,upgrade,uninstall
### e. Ensure Chocolatey Central Management ###
#### If you want to manage and report on endpoints, you can set up and configure
### Central Management. There are multiple portions to manage, so you'll see
### a section on agents here along with notes on how to configure the server
### side components.
- name: Install Chocolatey Agent
when: chocolatey_central_management_url is defined
win_chocolatey:
name: chocolatey-agent
source: ChocolateyInternal
state: latest
- name: Set the Central Management Service URL
when: chocolatey_central_management_url is defined
win_chocolatey_config:
name: CentralManagementServiceUrl
state: present
value: {{ chocolatey_central_management_url }}
- name: Set the Central Management Client Salt
when: chocolatey_central_management_client_salt is defined
win_chocolatey_config:
name: centralManagementClientCommunicationSaltAdditivePassword
state: present
value: {{ chocolatey_central_management_client_salt }}
- name: Set the Central Management Service Salt
when: chocolatey_central_management_service_salt is defined
win_chocolatey_config:
name: centralManagementServiceCommunicationSaltAdditivePassword
state: present
value: {{ chocolatey_central_management_service_salt }}
- name: Use Central Management
when: chocolatey_central_management_url is defined
win_chocolatey_feature:
name: useChocolateyCentralManagement
state: enabled
- name: Use Central Management Deployments
when: chocolatey_central_management_url is defined
win_chocolatey_feature:
name: useChocolateyCentralManagementDeployments
state: enabled
See docs at https://docs.chef.io/resource_chocolatey_package.html.
If Applicable - Chocolatey Configuration/Installation
## 1. REQUIREMENTS ##
### Here are the requirements necessary to ensure this is successful.
### a. Internal/Private Cloud Repository Set Up ###
#### You'll need an internal/private cloud repository you can use. These are
#### generally really quick to set up and there are quite a few options.
#### Chocolatey Software recommends Nexus, Artifactory Pro, or ProGet as they
#### are repository servers and will give you the ability to manage multiple
#### repositories and types from one server installation.
### b. Download Chocolatey Package and Put on Internal Repository ###
#### You need to have downloaded the Chocolatey package as well.
#### Please see https://chocolatey.org/install#organization
### c. Other Requirements ###
#### The Chocolatey resources are available with any recent version of Chef.
#### We utilise the Chocolatey recipe to install the Chocolatey binaries.
include_recipe "chocolatey"
## 2. TOP LEVEL VARIABLES ##
### a. Your internal repository url (the main one). ###
#### Should be similar to what you see when you browse
#### to https://community.chocolatey.org/api/v2/
NugetRepositoryUrl = "INTERNAL REPO URL"
### b. Internal Repository Credential ###
#### If required, add the repository access credential here
# NugetRepositoryUsername = "username"
# NugetRepositoryPassword = "password"
### c. Chocolatey nupkg download url ###
#### This url should result in an immediate download when you navigate to it in
#### a web browser
ChocolateyNupkgUrl = "INTERNAL REPO URL/package/chocolatey.1.1.0.nupkg",
### d. Chocolatey Central Management (CCM) ###
#### If using CCM to manage Chocolatey, add the following:
#### i. Endpoint URL for CCM
# ChocolateyCentralManagementUrl = "https://chocolatey-central-management:24020/ChocolateyManagementService"
#### ii. If using a Client Salt, add it here
# ChocolateyCentralManagementClientSalt = "clientsalt"
#### iii. If using a Service Salt, add it here
# ChocolateyCentralManagementServiceSalt = "servicesalt"
## 3. ENSURE CHOCOLATEY IS INSTALLED ##
### Ensure Chocolatey is installed from your internal repository
node['chocolatey']['install vars'] = {
'chocolateyDownloadUrl' => "#{ChocolateyNupkgUrl}",
}
## 4. CONFIGURE CHOCOLATEY BASELINE ##
### a. FIPS Feature ###
#### If you need FIPS compliance - make this the first thing you configure
#### before you do any additional configuration or package installations
# chocolatey_feature 'useFipsCompliantChecksums' do
# action :enable
# end
### b. Apply Recommended Configuration ###
#### Move cache location so Chocolatey is very deterministic about
#### cleaning up temporary data and the location is secured to admins
chocolatey_config 'cacheLocation' do
value 'C:\ProgramData\chocolatey\cache'
end
#### Increase timeout to at least 4 hours
chocolatey_config 'commandExecutionTimeoutSeconds' do
value '14400'
end
#### Turn off download progress when running choco through integrations
chocolatey_feature 'showDownloadProgress' do
action :disable
end
### c. Sources ###
#### Remove the default community package repository source
chocolatey_source 'chocolatey' do
action :remove
end
#### Add internal default sources
#### You could have multiple sources here, so we will provide an example
#### of one using the remote repo variable here
#### NOTE: This EXAMPLE may require changes
chocolatey_source 'ChocolateyInternal' do
source "#{NugetRepositoryUrl}"
priority 1
action :add
end
execute 'ChocolateyInternal' do
command "choco source add --name ChocolateyInternal -s #{NugetRepositoryUrl} -u=#{NugetRepositoryUsername} -p=#{NugetRepositoryPassword} --priority=1"
only_if { NugetRepositoryUsername != nil || NugetRepositoryPassword != nil }
end
### b. Keep Chocolatey Up To Date ###
#### Keep chocolatey up to date based on your internal source
#### You control the upgrades based on when you push an updated version
#### to your internal repository.
#### Note the source here is to the OData feed, similar to what you see
#### when you browse to https://community.chocolatey.org/api/v2/
chocolatey_package 'chocolatey' do
action :upgrade
source "#{NugetRepositoryUrl}"
end
## 5. ENSURE CHOCOLATEY FOR BUSINESS ##
### If you don't have Chocolatey for Business (C4B), you'll want to remove from here down.
### a. Ensure The License File Is Installed ###
#### Create a license package using script from https://docs.chocolatey.org/en-us/how-tos/setup-offline-installation#exercise-4-create-a-package-for-the-license
chocolatey_package 'chocolatey-license' do
action :install
source "#{NugetRepositoryUrl}"
end
### b. Disable The Licensed Source ###
#### The licensed source cannot be removed, so it must be disabled.
#### This must occur after the license has been set by the license package.
chocolatey_source 'chocolatey.licensed' do
action :disable
end
### c. Ensure Chocolatey Licensed Extension ###
#### You will have downloaded the licensed extension to your internal repository
#### as you have disabled the licensed repository in step 5b.
#### Ensure the chocolatey.extension package (aka Chocolatey Licensed Extension)
chocolatey_package 'chocolatey.extention' do
action install
source "#{NugetRepositoryUrl}"
end
#### The Chocolatey Licensed Extension unlocks all of the following, which also have configuration/feature items available with them. You may want to visit the feature pages to see what you might want to also enable:
#### - Package Builder - https://docs.chocolatey.org/en-us/features/paid/package-builder
#### - Package Internalizer - https://docs.chocolatey.org/en-us/features/paid/package-internalizer
#### - Package Synchronization (3 components) - https://docs.chocolatey.org/en-us/features/paid/package-synchronization
#### - Package Reducer - https://docs.chocolatey.org/en-us/features/paid/package-reducer
#### - Package Audit - https://docs.chocolatey.org/en-us/features/paid/package-audit
#### - Package Throttle - https://docs.chocolatey.org/en-us/features/paid/package-throttle
#### - CDN Cache Access - https://docs.chocolatey.org/en-us/features/paid/private-cdn
#### - Branding - https://docs.chocolatey.org/en-us/features/paid/branding
#### - Self-Service Anywhere (more components will need to be installed and additional configuration will need to be set) - https://docs.chocolatey.org/en-us/features/paid/self-service-anywhere
#### - Chocolatey Central Management (more components will need to be installed and additional configuration will need to be set) - https://docs.chocolatey.org/en-us/features/paid/chocolatey-central-management
#### - Other - https://docs.chocolatey.org/en-us/features/paid/
### d. Ensure Self-Service Anywhere ###
#### If you have desktop clients where users are not administrators, you may
#### to take advantage of deploying and configuring Self-Service anywhere
chocolatey_feature 'showNonElevatedWarnings' do
action :disable
end
chocolatey_feature 'useBackgroundService' do
action :enable
end
chocolatey_feature 'useBackgroundServiceWithNonAdministratorsOnly' do
action :enable
end
chocolatey_feature 'allowBackgroundServiceUninstallsFromUserInstallsOnly' do
action :enable
end
chocolatey_config 'backgroundServiceAllowedCommands' do
value 'install,upgrade,uninstall'
end
### e. Ensure Chocolatey Central Management ###
#### If you want to manage and report on endpoints, you can set up and configure
### Central Management. There are multiple portions to manage, so you'll see
### a section on agents here along with notes on how to configure the server
### side components.
chocolatey_package 'chocolatey-agent' do
action install
source "#{NugetRepositoryUrl}"
# user "#{NugetRepositoryUsername}"
# password "#{NugetRepositoryPassword}"
only_if { ChocolateyCentralManagementUrl != nil }
end
chocolatey_config 'CentralManagementServiceUrl' do
value "#{ChocolateyCentralManagementUrl}"
only_if { ChocolateyCentralManagementUrl != nil }
end
chocolatey_config 'centralManagementClientCommunicationSaltAdditivePassword' do
value "#{ChocolateyCentralManagementClientSalt}"
only_if { ChocolateyCentralManagementClientSalt != nil }
end
chocolatey_config 'centralManagementServiceCommunicationSaltAdditivePassword' do
value "#{ChocolateyCentralManagementServiceSalt}"
only_if { ChocolateyCentralManagementServiceSalt != nil }
end
chocolatey_feature 'useChocolateyCentralManagement' do
action :enable
only_if { ChocolateyCentralManagementUrl != nil }
end
chocolatey_feature 'useChocolateyCentralManagementDeployments' do
action :enable
only_if { ChocolateyCentralManagementUrl != nil }
end
Requires cChoco DSC Resource. See docs at https://github.com/chocolatey/cChoco.
If Applicable - Chocolatey Configuration/Installation
#requires -Modules cChoco
## 1. REQUIREMENTS ##
### Here are the requirements necessary to ensure this is successful.
### a. Internal/Private Cloud Repository Set Up ###
#### You'll need an internal/private cloud repository you can use. These are
#### generally really quick to set up and there are quite a few options.
#### Chocolatey Software recommends Nexus, Artifactory Pro, or ProGet as they
#### are repository servers and will give you the ability to manage multiple
#### repositories and types from one server installation.
### b. Download Chocolatey Package and Put on Internal Repository ###
#### You need to have downloaded the Chocolatey package as well.
#### Please see https://chocolatey.org/install#organization
### c. Other Requirements ###
#### i. Requires chocolatey\cChoco DSC module to be installed on the machine compiling the DSC manifest
#### NOTE: This will need to be installed before running the DSC portion of this script
if (-not (Get-Module cChoco -ListAvailable)) {
$null = Install-PackageProvider -Name NuGet -MinimumVersion 2.8.5.201 -Force
if (($PSGallery = Get-PSRepository -Name PSGallery).InstallationPolicy -ne "Trusted") {
Set-PSRepository -Name PSGallery -InstallationPolicy Trusted
}
Install-Module -Name cChoco
if ($PSGallery.InstallationPolicy -ne "Trusted") {
Set-PSRepository -Name PSGallery -InstallationPolicy $PSGallery.InstallationPolicy
}
}
#### ii. Requires a hosted copy of the install.ps1 script
##### This should be available to download without authentication.
##### The original script can be found here: https://community.chocolatey.org/install.ps1
Configuration ChocolateyConfig {
## 2. TOP LEVEL VARIABLES ##
param(
### a. Your internal repository url (the main one). ###
#### Should be similar to what you see when you browse
#### to https://community.chocolatey.org/api/v2/
$NugetRepositoryUrl = "INTERNAL REPO URL",
### b. Chocolatey nupkg download url ###
#### This url should result in an immediate download when you navigate to it in
#### a web browser
$ChocolateyNupkgUrl = "INTERNAL REPO URL/package/chocolatey.1.1.0.nupkg",
### c. Internal Repository Credential ###
#### If required, add the repository access credential here
# $NugetRepositoryCredential = [PSCredential]::new(
# "username",
# ("password" | ConvertTo-SecureString -AsPlainText -Force)
# ),
### d. Install.ps1 URL
#### The path to the hosted install script:
$ChocolateyInstallPs1Url = "https://community.chocolatey.org/install.ps1"
### e. Chocolatey Central Management (CCM) ###
#### If using CCM to manage Chocolatey, add the following:
#### i. Endpoint URL for CCM
# $ChocolateyCentralManagementUrl = "https://chocolatey-central-management:24020/ChocolateyManagementService",
#### ii. If using a Client Salt, add it here
# $ChocolateyCentralManagementClientSalt = "clientsalt",
#### iii. If using a Service Salt, add it here
# $ChocolateyCentralManagementServiceSalt = "servicesalt"
)
Import-DscResource -ModuleName PSDesiredStateConfiguration
Import-DscResource -ModuleName cChoco
Node 'localhost' {
## 3. ENSURE CHOCOLATEY IS INSTALLED ##
### Ensure Chocolatey is installed from your internal repository
Environment chocoDownloadUrl {
Name = "chocolateyDownloadUrl"
Value = $ChocolateyNupkgUrl
}
cChocoInstaller installChocolatey {
DependsOn = "[Environment]chocoDownloadUrl"
InstallDir = Join-Path $env:ProgramData "chocolatey"
ChocoInstallScriptUrl = $ChocolateyInstallPs1Url
}
## 4. CONFIGURE CHOCOLATEY BASELINE ##
### a. FIPS Feature ###
#### If you need FIPS compliance - make this the first thing you configure
#### before you do any additional configuration or package installations
# cChocoFeature featureFipsCompliance {
# FeatureName = "useFipsCompliantChecksums"
# }
### b. Apply Recommended Configuration ###
#### Move cache location so Chocolatey is very deterministic about
#### cleaning up temporary data and the location is secured to admins
cChocoConfig cacheLocation {
DependsOn = "[cChocoInstaller]installChocolatey"
ConfigName = "cacheLocation"
Value = "C:\ProgramData\chocolatey\cache"
}
#### Increase timeout to at least 4 hours
cChocoConfig commandExecutionTimeoutSeconds {
DependsOn = "[cChocoInstaller]installChocolatey"
ConfigName = "commandExecutionTimeoutSeconds"
Value = 14400
}
#### Turn off download progress when running choco through integrations
cChocoFeature showDownloadProgress {
DependsOn = "[cChocoInstaller]installChocolatey"
FeatureName = "showDownloadProgress"
Ensure = "Absent"
}
### c. Sources ###
#### Remove the default community package repository source
cChocoSource removeCommunityRepository {
DependsOn = "[cChocoInstaller]installChocolatey"
Name = "chocolatey"
Ensure = "Absent"
}
#### Add internal default sources
#### You could have multiple sources here, so we will provide an example
#### of one using the remote repo variable here.
#### NOTE: This EXAMPLE may require changes
cChocoSource addInternalSource {
DependsOn = "[cChocoInstaller]installChocolatey"
Name = "ChocolateyInternal"
Source = $NugetRepositoryUrl
Credentials = $NugetRepositoryCredential
Priority = 1
}
### b. Keep Chocolatey Up To Date ###
#### Keep chocolatey up to date based on your internal source
#### You control the upgrades based on when you push an updated version
#### to your internal repository.
#### Note the source here is to the OData feed, similar to what you see
#### when you browse to https://community.chocolatey.org/api/v2/
cChocoPackageInstaller updateChocolatey {
DependsOn = "[cChocoSource]addInternalSource", "[cChocoSource]removeCommunityRepository"
Name = "chocolatey"
AutoUpgrade = $true
}
## 5. ENSURE CHOCOLATEY FOR BUSINESS ##
### If you don't have Chocolatey for Business (C4B), you'll want to remove from here down.
### a. Ensure The License File Is Installed ###
#### Create a license package using script from https://docs.chocolatey.org/en-us/how-tos/setup-offline-installation#exercise-4-create-a-package-for-the-license
cChocoPackageInstaller chocolateyLicense {
DependsOn = "[cChocoPackageInstaller]updateChocolatey"
Name = "chocolatey-license"
}
### b. Disable The Licensed Source ###
#### The licensed source cannot be removed, so it must be disabled.
#### This must occur after the license has been set by the license package.
Script disableLicensedSource {
DependsOn = "[cChocoPackageInstaller]chocolateyLicense"
GetScript = {
$Source = choco source list --limitoutput | `
ConvertFrom-Csv -Delimiter '|' -Header Name, Source, Disabled | `
Where-Object Name -eq "chocolatey.licensed"
return @{
Result = if ($Source) {
[bool]::Parse($Source.Disabled)
} else {
Write-Warning "Source 'chocolatey.licensed' was not present."
$true # Source does not need disabling
}
}
}
SetScript = {
$null = choco source disable --name "chocolatey.licensed"
}
TestScript = {
$State = [ScriptBlock]::Create($GetScript).Invoke()
return $State.Result
}
}
### c. Ensure Chocolatey Licensed Extension ###
#### You will have downloaded the licensed extension to your internal repository
#### as you have disabled the licensed repository in step 5b.
#### Ensure the chocolatey.extension package (aka Chocolatey Licensed Extension)
cChocoPackageInstaller chocolateyLicensedExtension {
DependsOn = "[Script]disableLicensedSource"
Name = "chocolatey.extension"
}
#### The Chocolatey Licensed Extension unlocks all of the following, which also have configuration/feature items available with them. You may want to visit the feature pages to see what you might want to also enable:
#### - Package Builder - https://docs.chocolatey.org/en-us/features/paid/package-builder
#### - Package Internalizer - https://docs.chocolatey.org/en-us/features/paid/package-internalizer
#### - Package Synchronization (3 components) - https://docs.chocolatey.org/en-us/features/paid/package-synchronization
#### - Package Reducer - https://docs.chocolatey.org/en-us/features/paid/package-reducer
#### - Package Audit - https://docs.chocolatey.org/en-us/features/paid/package-audit
#### - Package Throttle - https://docs.chocolatey.org/en-us/features/paid/package-throttle
#### - CDN Cache Access - https://docs.chocolatey.org/en-us/features/paid/private-cdn
#### - Branding - https://docs.chocolatey.org/en-us/features/paid/branding
#### - Self-Service Anywhere (more components will need to be installed and additional configuration will need to be set) - https://docs.chocolatey.org/en-us/features/paid/self-service-anywhere
#### - Chocolatey Central Management (more components will need to be installed and additional configuration will need to be set) - https://docs.chocolatey.org/en-us/features/paid/chocolatey-central-management
#### - Other - https://docs.chocolatey.org/en-us/features/paid/
### d. Ensure Self-Service Anywhere ###
#### If you have desktop clients where users are not administrators, you may
#### to take advantage of deploying and configuring Self-Service anywhere
cChocoFeature hideElevatedWarnings {
DependsOn = "[cChocoPackageInstaller]chocolateyLicensedExtension"
FeatureName = "showNonElevatedWarnings"
Ensure = "Absent"
}
cChocoFeature useBackgroundService {
DependsOn = "[cChocoPackageInstaller]chocolateyLicensedExtension"
FeatureName = "useBackgroundService"
Ensure = "Present"
}
cChocoFeature useBackgroundServiceWithNonAdmins {
DependsOn = "[cChocoPackageInstaller]chocolateyLicensedExtension"
FeatureName = "useBackgroundServiceWithNonAdministratorsOnly"
Ensure = "Present"
}
cChocoFeature useBackgroundServiceUninstallsForUserInstalls {
DependsOn = "[cChocoPackageInstaller]chocolateyLicensedExtension"
FeatureName = "allowBackgroundServiceUninstallsFromUserInstallsOnly"
Ensure = "Present"
}
cChocoConfig allowedBackgroundServiceCommands {
DependsOn = "[cChocoFeature]useBackgroundService"
ConfigName = "backgroundServiceAllowedCommands"
Value = "install,upgrade,uninstall"
}
### e. Ensure Chocolatey Central Management ###
#### If you want to manage and report on endpoints, you can set up and configure
### Central Management. There are multiple portions to manage, so you'll see
### a section on agents here along with notes on how to configure the server
### side components.
if ($ChocolateyCentralManagementUrl) {
cChocoPackageInstaller chocolateyAgent {
DependsOn = "[cChocoPackageInstaller]chocolateyLicensedExtension"
Name = "chocolatey-agent"
}
cChocoConfig centralManagementServiceUrl {
DependsOn = "[cChocoPackageInstaller]chocolateyAgent"
ConfigName = "CentralManagementServiceUrl"
Value = $ChocolateyCentralManagementUrl
}
if ($ChocolateyCentralManagementClientSalt) {
cChocoConfig centralManagementClientSalt {
DependsOn = "[cChocoPackageInstaller]chocolateyAgent"
ConfigName = "centralManagementClientCommunicationSaltAdditivePassword"
Value = $ChocolateyCentralManagementClientSalt
}
}
if ($ChocolateyCentralManagementServiceSalt) {
cChocoConfig centralManagementServiceSalt {
DependsOn = "[cChocoPackageInstaller]chocolateyAgent"
ConfigName = "centralManagementServiceCommunicationSaltAdditivePassword"
Value = $ChocolateyCentralManagementServiceSalt
}
}
cChocoFeature useCentralManagement {
DependsOn = "[cChocoPackageInstaller]chocolateyAgent"
FeatureName = "useChocolateyCentralManagement"
Ensure = "Present"
}
cChocoFeature useCentralManagementDeployments {
DependsOn = "[cChocoPackageInstaller]chocolateyAgent"
FeatureName = "useChocolateyCentralManagementDeployments"
Ensure = "Present"
}
}
}
}
# If working this into an existing configuration with a good method for
$ConfigData = @{
AllNodes = @(
@{
NodeName = "localhost"
PSDscAllowPlainTextPassword = $true
}
)
}
try {
Push-Location $env:Temp
$Config = ChocolateyConfig -ConfigurationData $ConfigData
Start-DscConfiguration -Path $Config.PSParentPath -Wait -Verbose -Force
} finally {
Pop-Location
}
Requires Puppet Chocolatey Provider module. See docs at https://forge.puppet.com/puppetlabs/chocolatey.
If Applicable - Chocolatey Configuration/Installation
## 1. REQUIREMENTS ##
### Here are the requirements necessary to ensure this is successful.
### a. Internal/Private Cloud Repository Set Up ###
#### You'll need an internal/private cloud repository you can use. These are
#### generally really quick to set up and there are quite a few options.
#### Chocolatey Software recommends Nexus, Artifactory Pro, or ProGet as they
#### are repository servers and will give you the ability to manage multiple
#### repositories and types from one server installation.
### b. Download Chocolatey Package and Put on Internal Repository ###
#### You need to have downloaded the Chocolatey package as well.
#### Please see https://chocolatey.org/install#organization
### c. Other Requirements ###
#### i. Requires puppetlabs/chocolatey module
#### See https://forge.puppet.com/puppetlabs/chocolatey
## 2. TOP LEVEL VARIABLES ##
### a. Your internal repository url (the main one). ###
#### Should be similar to what you see when you browse
#### to https://community.chocolatey.org/api/v2/
$_repository_url = 'INTERNAL REPO URL'
### b. Chocolatey nupkg download url ###
#### This url should result in an immediate download when you navigate to it in
#### a web browser
$_choco_download_url = 'INTERNAL REPO URL/package/chocolatey.1.1.0.nupkg'
### c. Chocolatey Central Management (CCM) ###
#### If using CCM to manage Chocolatey, add the following:
#### i. Endpoint URL for CCM
# $_chocolatey_central_management_url = 'https://chocolatey-central-management:24020/ChocolateyManagementService'
#### ii. If using a Client Salt, add it here
# $_chocolatey_central_management_client_salt = "clientsalt"
#### iii. If using a Service Salt, add it here
# $_chocolatey_central_management_service_salt = 'servicesalt'
## 3. ENSURE CHOCOLATEY IS INSTALLED ##
### Ensure Chocolatey is installed from your internal repository
### Note: `chocolatey_download_url is completely different than normal
### source locations. This is directly to the bare download url for the
### chocolatey.nupkg, similar to what you see when you browse to
### https://community.chocolatey.org/api/v2/package/chocolatey
class {'chocolatey':
chocolatey_download_url => $_choco_download_url,
use_7zip => false,
}
## 4. CONFIGURE CHOCOLATEY BASELINE ##
### a. FIPS Feature ###
#### If you need FIPS compliance - make this the first thing you configure
#### before you do any additional configuration or package installations
#chocolateyfeature {'useFipsCompliantChecksums':
# ensure => enabled,
#}
### b. Apply Recommended Configuration ###
#### Move cache location so Chocolatey is very deterministic about
#### cleaning up temporary data and the location is secured to admins
chocolateyconfig {'cacheLocation':
value => 'C:\ProgramData\chocolatey\cache',
}
#### Increase timeout to at least 4 hours
chocolateyconfig {'commandExecutionTimeoutSeconds':
value => '14400',
}
#### Turn off download progress when running choco through integrations
chocolateyfeature {'showDownloadProgress':
ensure => disabled,
}
### c. Sources ###
#### Remove the default community package repository source
chocolateysource {'chocolatey':
ensure => absent,
location => 'https://community.chocolatey.org/api/v2/',
}
#### Add internal default sources
#### You could have multiple sources here, so we will provide an example
#### of one using the remote repo variable here
#### NOTE: This EXAMPLE requires changes
chocolateysource {'internal_chocolatey':
ensure => present,
location => $_repository_url,
priority => 1,
username => 'optional',
password => 'optional,not ensured',
bypass_proxy => true,
admin_only => false,
allow_self_service => false,
}
### b. Keep Chocolatey Up To Date ###
#### Keep chocolatey up to date based on your internal source
#### You control the upgrades based on when you push an updated version
#### to your internal repository.
#### Note the source here is to the OData feed, similar to what you see
#### when you browse to https://community.chocolatey.org/api/v2/
package {'chocolatey':
ensure => latest,
provider => chocolatey,
source => $_repository_url,
}
## 5. ENSURE CHOCOLATEY FOR BUSINESS ##
### If you don't have Chocolatey for Business (C4B), you'll want to remove from here down.
### a. Ensure The License File Is Installed ###
#### Create a license package using script from https://docs.chocolatey.org/en-us/guides/organizations/organizational-deployment-guide#exercise-4-create-a-package-for-the-license
# TODO: Add resource for installing/ensuring the chocolatey-license package
package {'chocolatey-license':
ensure => latest,
provider => chocolatey,
source => $_repository_url,
}
### b. Disable The Licensed Source ###
#### The licensed source cannot be removed, so it must be disabled.
#### This must occur after the license has been set by the license package.
## Disabled sources still need all other attributes until
## https://tickets.puppetlabs.com/browse/MODULES-4449 is resolved.
## Password is necessary with user, but not ensurable, so it should not
## matter what it is set to here. If you ever do get into trouble here,
## the password is your license GUID.
chocolateysource {'chocolatey.licensed':
ensure => disabled,
priority => '10',
user => 'customer',
password => '1234',
require => Package['chocolatey-license'],
}
### c. Ensure Chocolatey Licensed Extension ###
#### You will have downloaded the licensed extension to your internal repository
#### as you have disabled the licensed repository in step 5b.
#### Ensure the chocolatey.extension package (aka Chocolatey Licensed Extension)
package {'chocolatey.extension':
ensure => latest,
provider => chocolatey,
source => $_repository_url,
require => Package['chocolatey-license'],
}
#### The Chocolatey Licensed Extension unlocks all of the following, which also have configuration/feature items available with them. You may want to visit the feature pages to see what you might want to also enable:
#### - Package Builder - https://docs.chocolatey.org/en-us/features/paid/package-builder
#### - Package Internalizer - https://docs.chocolatey.org/en-us/features/paid/package-internalizer
#### - Package Synchronization (3 components) - https://docs.chocolatey.org/en-us/features/paid/package-synchronization
#### - Package Reducer - https://docs.chocolatey.org/en-us/features/paid/package-reducer
#### - Package Audit - https://docs.chocolatey.org/en-us/features/paid/package-audit
#### - Package Throttle - https://docs.chocolatey.org/en-us/features/paid/package-throttle
#### - CDN Cache Access - https://docs.chocolatey.org/en-us/features/paid/private-cdn
#### - Branding - https://docs.chocolatey.org/en-us/features/paid/branding
#### - Self-Service Anywhere (more components will need to be installed and additional configuration will need to be set) - https://docs.chocolatey.org/en-us/features/paid/self-service-anywhere
#### - Chocolatey Central Management (more components will need to be installed and additional configuration will need to be set) - https://docs.chocolatey.org/en-us/features/paid/chocolatey-central-management
#### - Other - https://docs.chocolatey.org/en-us/features/paid/
### d. Ensure Self-Service Anywhere ###
#### If you have desktop clients where users are not administrators, you may
#### to take advantage of deploying and configuring Self-Service anywhere
chocolateyfeature {'showNonElevatedWarnings':
ensure => disabled,
}
chocolateyfeature {'useBackgroundService':
ensure => enabled,
}
chocolateyfeature {'useBackgroundServiceWithNonAdministratorsOnly':
ensure => enabled,
}
chocolateyfeature {'allowBackgroundServiceUninstallsFromUserInstallsOnly':
ensure => enabled,
}
chocolateyconfig {'backgroundServiceAllowedCommands':
value => 'install,upgrade,uninstall',
}
### e. Ensure Chocolatey Central Management ###
#### If you want to manage and report on endpoints, you can set up and configure
### Central Management. There are multiple portions to manage, so you'll see
### a section on agents here along with notes on how to configure the server
### side components.
if $_chocolatey_central_management_url {
package {'chocolatey-agent':
ensure => latest,
provider => chocolatey,
source => $_repository_url,
require => Package['chocolatey-license'],
}
chocolateyconfig {'CentralManagementServiceUrl':
value => $_chocolatey_central_management_url,
}
if $_chocolatey_central_management_client_salt {
chocolateyconfig {'centralManagementClientCommunicationSaltAdditivePassword':
value => $_chocolatey_central_management_client_salt,
}
}
if $_chocolatey_central_management_service_salt {
chocolateyconfig {'centralManagementClientCommunicationSaltAdditivePassword':
value => $_chocolatey_central_management_client_salt,
}
}
chocolateyfeature {'useChocolateyCentralManagement':
ensure => enabled,
require => Package['chocolatey-agent'],
}
chocolateyfeature {'useChocolateyCentralManagementDeployments':
ensure => enabled,
require => Package['chocolatey-agent'],
}
}
Need Help? View our docs or file an issue.
There is already a version of this package in your Script Builder
Current Version | New Version |
---|---|
- Passing
- Failing
- Pending
- Unknown / Exempted

Downloads:
284,711
Downloads of v 22.3:
11,023
Last Update:
26 Mar 2022
Package Maintainer(s):
Software Author(s):
- Christian Schenk
Tags:
miktex tex latex pdf typesetting foss embedded
MiKTeX (Install)
- 1
- 2
- 3
22.3 | Updated: 26 Mar 2022
Downloads:
284,711
Downloads of v 22.3:
11,023
Maintainer(s):
Software Author(s):
- Christian Schenk
Edit Package
To edit the metadata for a package, please upload an updated version of the package.
Chocolatey's Community Package Repository currently does not allow updating package metadata on the website. This helps ensure that the package itself (and the source used to build the package) remains the one true source of package metadata.
This does require that you increment the package version.
- 1
- 2
- 3
MiKTeX (Install)
22.3
- 1
- 2
- 3
All Checks are Passing
3 Passing Tests
Deployment Method: Individual Install, Upgrade, & Uninstall
To install MiKTeX (Install), run the following command from the command line or from PowerShell:
To upgrade MiKTeX (Install), run the following command from the command line or from PowerShell:
To uninstall MiKTeX (Install), run the following command from the command line or from PowerShell:
Deployment Method:
📝 NOTE: This applies to both open source and commercial editions of Chocolatey.
1. Enter Your Internal Repository Url
(this should look similar to https://community.chocolatey.org/api/v2/)
2. Setup Your Environment
1. Ensure you are set for organizational deployment
Please see the organizational deployment guide
2. Get the package into your environment
Option 1: Cached Package (Unreliable, Requires Internet - Same As Community)-
Open Source or Commercial:
- Proxy Repository - Create a proxy nuget repository on Nexus, Artifactory Pro, or a proxy Chocolatey repository on ProGet. Point your upstream to https://community.chocolatey.org/api/v2/. Packages cache on first access automatically. Make sure your choco clients are using your proxy repository as a source and NOT the default community repository. See source command for more information.
- You can also just download the package and push it to a repository Download
-
Open Source
-
Download the package:
Download - Follow manual internalization instructions
-
-
Package Internalizer (C4B)
-
Run: (additional options)
choco download miktex.install --internalize --source=https://community.chocolatey.org/api/v2/
-
For package and dependencies run:
choco push --source="'INTERNAL REPO URL'"
- Automate package internalization
-
Run: (additional options)
3. Copy Your Script
choco upgrade miktex.install -y --source="'INTERNAL REPO URL'" [other options]
See options you can pass to upgrade.
See best practices for scripting.
Add this to a PowerShell script or use a Batch script with tools and in places where you are calling directly to Chocolatey. If you are integrating, keep in mind enhanced exit codes.
If you do use a PowerShell script, use the following to ensure bad exit codes are shown as failures:
choco upgrade miktex.install -y --source="'INTERNAL REPO URL'"
$exitCode = $LASTEXITCODE
Write-Verbose "Exit code was $exitCode"
$validExitCodes = @(0, 1605, 1614, 1641, 3010)
if ($validExitCodes -contains $exitCode) {
Exit 0
}
Exit $exitCode
- name: Install miktex.install
win_chocolatey:
name: miktex.install
version: '22.3'
source: INTERNAL REPO URL
state: present
See docs at https://docs.ansible.com/ansible/latest/modules/win_chocolatey_module.html.
chocolatey_package 'miktex.install' do
action :install
source 'INTERNAL REPO URL'
version '22.3'
end
See docs at https://docs.chef.io/resource_chocolatey_package.html.
cChocoPackageInstaller miktex.install
{
Name = "miktex.install"
Version = "22.3"
Source = "INTERNAL REPO URL"
}
Requires cChoco DSC Resource. See docs at https://github.com/chocolatey/cChoco.
package { 'miktex.install':
ensure => '22.3',
provider => 'chocolatey',
source => 'INTERNAL REPO URL',
}
Requires Puppet Chocolatey Provider module. See docs at https://forge.puppet.com/puppetlabs/chocolatey.
4. If applicable - Chocolatey configuration/installation
See infrastructure management matrix for Chocolatey configuration elements and examples.
This package is likely a meta/virtual (*) or an installer (*.install) or portable (*.portable) application package.
- Meta/virtual (*) - has a dependency on the *.install or the *.portable package - it is provided for discoverability and for other packages to take a dependency on.
- Portable (*.portable/*.commandline (deprecated naming convention)/*.tool (deprecated naming convention)) - usually zips or archives that require no administrative access to install.
- Install (*.install/*.app (deprecated naming convention)) - uses native installers, usually requires administrative access to install.
Learn more about chocolatey's distinction of installed versus portable apps and/or learn about this kind of package.
This package was approved as a trusted package on 26 Mar 2022.
MiKTeX (pronounced mick-tech) is an up-to-date implementation of TeX/LaTeX and related programs. TeX is a typesetting system written by Donald Ervin Knuth who says that it is intended for the creation of beautiful books - and especially for books that contain a lot of mathematics.
MiKTeX comes with TeXworks, a TeX frontend which you can use it to edit and preview LaTeX documents.
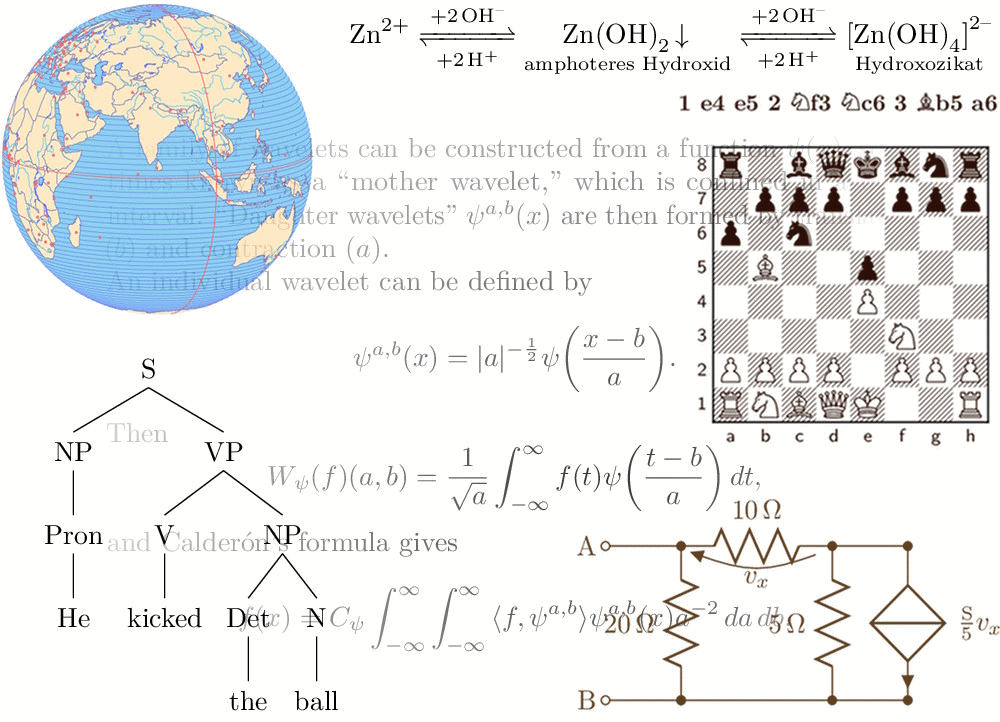
The sky is the limit when it comes to TeX/LaTeX, with drawings, chemical equations, syntax trees, circuit diagrams, mathematical expressions, proof systems, chessboards and more! (Image source)
MiKTeX's integrated package manager installs missing components from the Internet, if required.
Package Set Parameter (optional)
/Set:(option)
- Download and install theessential
,basic
(default), orcomplete
set of TeX packages/tools./Mirror:(URL)
- This will use the(url)
, a CTAN mirror to download MiKTeX. It is recommended to only use this if the default mirror as chosen by the MiKTeX setup utility doesn't work for some reason.* Hint: Including/Mirror
(valid or not) will write the list of "official", URLs to the Chocolatey log./ThisUser
- This will install MiKTeX for only this user. **Note: This can cause confusion for other users as Chocolatey will claim MiKTeX is installed but other users will (potentially) not be able to see/use it.
Custom Repository Parameter (optional)
This package has only the MiKTeX setup utility embedded. Any new install of MiKTeX involves using the setup utility to download and create a (temporary by default) repository and then installing from that repository. This Chocolatey package can both establish a more permenant repository (for sharing with other computers) and use a specific (possibly private) repository from which to install MiKTeX. Thus a single computer within a network could download MiKTeX from the internet and create a repository, and all other computers on the network could use that repository to install MiKTeX saving external bandwidth.
Using a Custom Repository:
/RepoPath:(path)
-- with a local or UNC path. This will install or update MiKTeX from a specific existing repository. No attempt to update the repository itself will be made. Upgrades should use this repository in the future by default. Note: If both/RepoPath
(with a UNC path) and/Mirror
are used,/Mirror
will be ignored.
Creating a Custom Repository:
/RepoPath:(path)
- with a local directory as(path)
. This will create (or update) the repository in the location. MiKTeX will also be installed. Note: The repository will not be shared or accessible to other systems without additional administrator actions and will not be removed on an uninstall.
Examples:
- On a server, you might use:
choco install miktex.install --params '"/Set:complete /RepoPath:""c:\Shared Files\MiKTeX-Repo"""'
Double-double quotes (i.e. ""path""
) are necessary for paths containing a space.
- On a workstation in the same network, you might use:
choco install miktex.install --params '"/RepoPath:\\localserver\MiKTeX-Repo"'
$ErrorActionPreference = 'Stop'
$PackageMileStone = '22.3'
$toolsDir = "$(Split-Path -parent $MyInvocation.MyCommand.Definition)"
# Remove any previously unzipped installers
Get-ChildItem $toolsDir -Filter *.exe -Recurse | ForEach-Object { Remove-Item $_.fullname -Force }
$ZipFiles = Get-ChildItem -Path $toolsDir -Filter '*.zip' | Sort-Object LastWriteTime | Select-Object -ExpandProperty FullName -Last 2
$ZipArgs = @{
PackageName = $env:ChocolateyPackageName
FileFullPath = $ZipFiles | Where-Object {$_ -notmatch 'x64'}
FileFullPath64 = $ZipFiles | Where-Object {$_ -match 'x64'}
Destination = $toolsDir
}
$null = Get-ChocolateyUnzip @ZipArgs
$MiKTeXsetup = Get-ChildItem $toolsDir 'miktexsetup*.exe' -Recurse | Select-Object -ExpandProperty FullName
Write-Verbose "Found setup utility: $MiKTeXsetup"
$null = New-Item -Path "$MiKTeXsetup.ignore" -ItemType file -Force
$pp = Get-PackageParameters
# What kind of install?
Switch ($pp['set']) {
'essential' { $set = 'essential'
$msg = 'Downloading a "Essential" package set to install.'; break }
'complete' { $set = 'complete'
$msg = 'Downloading a "Complete" package set to install.\n' +
'This is large and may take some time. Please be patient.'; break }
default { $set = 'basic'
$msg = 'Downloading a "Basic" package set to install.'; break }
}
Write-Host $msg -ForegroundColor Cyan
$LocalRepo = $false
$Repository = ''
$Mirror = ''
if ($pp['RepoPath']) {
$LocalRepo = -not (([uri]($pp['RepoPath'])).hostnametype.tostring().equals('Dns'))
$Repository = $pp['RepoPath']
if (-not $LocalRepo) {
if ($Repository -match '^(https?:|ftp:)') {
Throw "RepoPath must be a local or UNC path!"
}
}
}
# Include a list of mirrors in logs if Mirror is called
if ($pp['Mirror']) {
$List = & $MiKTeXsetup --list-repositories
$List = $List -join "`n`t"
Write-Verbose "`nRegistered repositories:`n`t$list"
$Mirror = $pp['Mirror']
Write-Verbose "Attempting to download from specified mirror: $Mirror"
$MirrorSwitch = "--remote-package-repository=`"$Mirror`""
} else { $MirrorSwitch = '' }
# Is MiKTeX already installed?
[array]$key = Get-UninstallRegistryKey -SoftwareName 'miktex*'
if ($key.Count -gt 1) {
Throw 'More than one install of MiKTeX already exists!'
} elseif ($key.Count -eq 1) {
if ($key.PSPath -match 'HKEY_CURRENT_USER') { $admin = '' } else { $admin = '--admin' }
# Use MiKTeX's built-in updater
$InstallDir = (Split-Path $key.UninstallString).trim('"')
Write-Verbose "Found an install of MiKTeX at '$InstallDir'."
$InitEXMF = Join-Path $InstallDir 'initexmf.exe'
Write-Verbose "Running 'initexmf.exe' to identify installed milestone."
$MileStoneLine = & $InitEXMF $admin --report | Where-Object {$_ -match '^(CurrentVersion|MiKTeX):'}
$MileStone = $MileStoneLine.split()[-1]
Write-Host "Found MiKTeX milestone $MileStone currently installed." -ForegroundColor Cyan
If (([Version]$MileStone -lt [Version]$PackageMileStone) -or $env:ChocolateyForce) {
Write-Host 'Updating to the latest MiKTeX milestone.' -ForegroundColor Cyan
if ($LocalRepo) {
if (test-path $Repository) {
Write-Verbose "Updating local MiKTeX repository at '$Repository'."
} else {
Write-Verbose "Local MiKTeX repository not found. Creating one at '$Repository'."
}
$DownloadArgs = @{
Statements = "--verbose --local-package-repository=`"$Repository`" $MirrorSwitch --package-set=$set download "
ExetoRun = $MiKTeXsetup
WorkingDirectory = $toolsDir
validExitCodes = @(0)
}
$exitCode = Start-ChocolateyProcessAsAdmin @DownloadArgs
}
$MPM = Join-Path $InstallDir 'mpm.exe'
if ($Repository -eq '' -and $Mirror -ne '') { $Repository = $Mirror }
if ($Repository -ne '') { $RepoSwitch = "--repository=`"$Repository`"" }
$SetupArgs = @{
Statements = "$admin --verbose --update $RepoSwitch"
ExetoRun = $MPM
WorkingDirectory = $InstallDir
validExitCodes = @(0)
}
$exitCode = Start-ChocolateyProcessAsAdmin @SetupArgs
} else {
Write-Verbose 'Installed Milestone of MiKTeX is the same or newer than this package version.'
Return
}
} elseif ($key.Count -eq 0) {
# MiKTeX install requires a repository
if ($Repository -eq '') {
# Use a temporary repository if one not given
$Repository = Join-Path $env:TEMP 'MiKTeX-repository'
$LocalRepo = $true
$Temporary = ' temporary'
}
$RepoSwitch = "--local-package-repository=`"$Repository`""
if ($LocalRepo) {
# Only create a repository if it is local; remote repositories need to be updated independently.
Write-Host "Creating a$Temporary repository at '$Repository'."
$DownloadArgs = @{
Statements = "--verbose $RepoSwitch $MirrorSwitch --package-set=$set download "
ExetoRun = $MiKTeXsetup
WorkingDirectory = $toolsDir
validExitCodes = @(0)
}
$exitCode = Start-ChocolateyProcessAsAdmin @DownloadArgs
}
# Now, do the actual install from identified repository
$installmsg = "Installing from$Temporary MiKTeX repository for "
if ($pp['ThisUser']) {
$admin = ''
$Shared = 'no'
$installmsg += 'just this user.'
} else {
$admin = '--admin'
$shared = 'yes'
$installmsg += 'all users.'
}
Write-Host $installmsg
$InstallArgs = @{
Statements = "--verbose $RepoSwitch --package-set=$set --shared=$Shared install "
ExetoRun = $MiKTeXsetup
WorkingDirectory = $toolsDir
validExitCodes = @(0)
}
$exitCode = Start-ChocolateyProcessAsAdmin @InstallArgs
}
# Once installed/updated, confirm it's the correct milestone.
[array]$key = Get-UninstallRegistryKey -SoftwareName 'miktex*'
$InstallDir = (Split-Path $key.UninstallString).trim('"')
$InitEXMF = Join-Path $InstallDir 'initexmf.exe'
Write-Verbose "Using 'initexmf.exe' to identify installed milestone."
$ErrorActionPreference = 'SilentlyContinue'
$MileStoneLine = & "$InitEXMF" $admin --report 2>&1 | Where-Object {$_ -match '^CurrentVersion:'}
$ErrorActionPreference = 'Stop'
$MileStone = $MileStoneLine.split()[-1]
Write-Verbose "Verified MiKTeX milestone $MileStone installed."
If ([version]$MileStone -lt [version]$PackageMileStone) {
Throw "Repository was unable to provide MiKTeX milestone $PackageMileStone"
}
# configure MiKTeX to automatically install missing packages on the fly
Write-Verbose 'Adjusting settings so MiKTeX installs missing packages on the fly.'
$SetupArgs = @{
Statements = "$admin --verbose --set-config-value=[MPM]AutoInstall=1"
ExetoRun = $InitEXMF
WorkingDirectory = $InstallDir
validExitCodes = @(0)
}
$exitCode = Start-ChocolateyProcessAsAdmin @SetupArgs
$ErrorActionPreference = 'Stop'
# Is MiKTeX already installed?
[array]$key = Get-UninstallRegistryKey -SoftwareName 'miktex*'
if ($key.Count -gt 1) {
Throw 'More than one install of MiKTeX found! Cannot uninstall without risking other copies.'
} elseif ($key.Count -eq 1) {
if ($key.PSPath -match 'HKEY_CURRENT_USER') { $shared = 'no' } else { $shared = 'yes' }
Write-Verbose "Found an install of MiKTeX."
# Use MiKTeX's built-in updater
$InstallDir = (Split-Path $key.UninstallString).trim('"')
$MiKTeXsetup = Join-Path $InstallDir 'miktexsetup.exe'
Write-Verbose 'Uninstalling MiKTeX using integrated setup utility.'
$InstallArgs = @{
Statements = "--verbose --shared=$shared uninstall"
ExetoRun = $MiKTeXsetup
WorkingDirectory = $InstallDir
validExitCodes = @(0)
}
$exitCode = Start-ChocolateyProcessAsAdmin @InstallArgs
Write-Verbose "MiKTeX uninstall process exited with: $exitCode"
# Sometimes items are left behind
if (Test-Path "$env:ProgramData\Microsoft\Windows\Start Menu\Programs\MiKTeX") {
Remove-Item "$env:ProgramData\Microsoft\Windows\Start Menu\Programs\MiKTeX" -Force -Recurse
}
}
From: https://miktex.org/copying
--------------------------------------------------------------
_The following article is an adaption of the article “Copying
conditions for TeX Live” (reference given at the end)._
## Copying conditions for MiKTeX
To the best of our knowledge, all software in the MiKTeX distribution
is freely redistributable (libre, that is, not necessarily gratis),
within the Free Software Foundation's definition and the Debian Free
Software Guidelines. Where the two conflict, we generally follow the
FSF. If you find any non-free files included, please contact us
(reference given at the end).
That said, MiKTeX has neither a single copyright holder nor a single
license covering its entire contents, since it is a collection of many
independent packages. Therefore, you may copy, modify, and/or
redistribute software from MiKTeX only if you comply with the
requirements placed thereon by the owners of the respective packages.
To most easily learn these requirements, we suggest checking the
MiKTeX package catalogue (reference given at the end). Of course the
legal statements within the packages themselves are the final
authority.
### Guidelines for redistribution
In general, you may redistribute MiKTeX, with or without modification,
for profit or not, according to the usual free software tenets. Here
are some general guidelines for doing this:
* If you make any changes to the MiKTeX distribution or any package it
contains, besides complying with any licensing requirements, you
must prominently mention such changes in your modified distribution
so that users do not take your work for ours, and know to contact
you, not us, in case of questions or problems.
* Especially (but not necessarily) if changes or additions are made,
we recommend a clearly different title, such as “Your work, based on
MiKTeX x.y.zzzz”, where x.y.zzzz is the Git tag of the MiKTeX
version you are using. This credits both our work and yours.
* You absolutely may not place your own copyright on the entire
distribution, since it is not your work. Statements such as “all
rights reserved” and “may not be reproduced” are especially
reprehensible, since they are antithetical to the free software
principles under which MiKTeX is produced.
* You may use any cover or media label designs that you wish. Such
packaging and marketing details are not covered by any MiKTeX
license.
* Finally, we make the following requests (not legal requirements):
a. Acknowledging that the MiKTeX distribution is developed as a
joint effort by all TeX user groups, and encouraging the
user/reader to join their user group of choice, as listed on the
web page <http://www.tug.org/usergroups.html>.
b. Referencing the MiKTeX project page: <https://miktex.org/>.
Such information may be placed on the label of your media, your
cover, and/or in accompanying text (for instance, in the
acknowledgements section of a book).
Finally, although it is certainly not a requirement, we'd like to
invite any redistributors to make a donation to the project, whether
cash or in-kind, for example via
<https://miktex.org/giveback>. Thanks.
### References
1. MiKTeX project contact form: <https://miktex.org/email/>
2. MiKTeX package catalogue: <https://miktex.org/packages/>
3. Copying conditions for TeX Live: <http://tug.org/texlive/LICENSE.TL>
4. The FSF's free software definition: <https://www.gnu.org/philosophy/free-sw.html>
5. Debian Free Software Guidelines: <https://www.debian.org/intro/free>
6. FSF commentary on existing licenses: <https://www.gnu.org/licenses/license-list.html>
md5: A3CCB9E3E8C9745DD2478AA0BD18A588 | sha1: C6CC441775023C10D18A5AFF7C3C6C4FF30E430F | sha256: E866F27AA24EA0CA27EECC631ABAE3E750E42A94A49A01814D686B0BD2E14877 | sha512: 10D40898BFDA6C7C224CD20D8C67E0E21D52EB517B5FDFB0C1E8C57F8BAEA1B3F512365723AA97CE8CC700F9463498E01B8EFF58FF89F45ED641D89AF7E2F80B
md5: B45F584A1A40AC4B35D390C7AF2C97EF | sha1: 1EFC1F7230B2BA35451DB46B62E2B82877937303 | sha256: 9FB30F32211B2369CD4D4AC1DF5F5169777B1758AA9204906E64BB1511A198B8 | sha512: A1A5D95676F09EA75B2D4B68A1C405F424D0DB54132F76EF91A2829EBB93E857C78981C2BCBAF401EACDD2760D5DF14BA0D199D2136E1F5A25CBF0B6CBC2DBB9
VERIFICATION
Verification is intended to assist the Chocolatey moderators and community
in verifying that this package's contents are trustworthy.
The embedded MiKTeX setup utility (which does NOT contain all the
sub-packages that make up a MiKTeX installation) is available here:
https://miktex.org/download
With the "All Downloads" tab displayed, expand the 32-bit and/or 64-bit
"MiKTeX Setup Utility" sections. There you can see the SHA-256 hash,
and get the file via the "Download" button.
Direct Download:
Milestone = '22.3'
32-bit URL = 'https://miktex.org/download/ctan/systems/win32/miktex/setup/windows-x86/miktexsetup-4.2.zip'
32-bit checksum = '9FB30F32211B2369CD4D4AC1DF5F5169777B1758AA9204906E64BB1511A198B8'
64-bit URL = 'https://miktex.org/download/ctan/systems/win32/miktex/setup/windows-x64/miktexsetup-4.2-x64.zip'
64-bit checksum = 'E866F27AA24EA0CA27EECC631ABAE3E750E42A94A49A01814D686B0BD2E14877'
Note that the version of the Chocolatey package identifies the MiKTeX
"milestone", not the version of the setup utility embedded in the package.
They are not always the same version.
Log in or click on link to see number of positives.
- miktexsetup-4.2-x64.zip (e866f27aa24e) - ## / 60
- miktexsetup-4.2.zip (9fb30f32211b) - ## / 60
- miktex.install.22.3.nupkg (cc08c1588864) - ## / 60
In cases where actual malware is found, the packages are subject to removal. Software sometimes has false positives. Moderators do not necessarily validate the safety of the underlying software, only that a package retrieves software from the official distribution point and/or validate embedded software against official distribution point (where distribution rights allow redistribution).
Chocolatey Pro provides runtime protection from possible malware.
Add to Builder | Version | Downloads | Last Updated | Status |
---|---|---|---|---|
MiKTeX (Install) 22.3 | 11023 | Saturday, March 26, 2022 | Approved | |
MiKTeX (Install) 22.1 | 8732 | Wednesday, February 2, 2022 | Approved | |
MiKTeX (Install) 21.12 | 6363 | Wednesday, December 29, 2021 | Approved | |
MiKTeX (Install) 21.10 | 8875 | Saturday, November 6, 2021 | Approved | |
MiKTeX (Install) 21.8 | 8544 | Thursday, September 16, 2021 | Approved | |
MiKTeX (Install) 21.6.28 | 12194 | Tuesday, July 13, 2021 | Approved | |
MiKTeX (Install) 21.3 | 13465 | Saturday, April 3, 2021 | Approved | |
MiKTeX (Install) 21.2 | 7238 | Wednesday, February 24, 2021 | Approved | |
MiKTeX (Install) 21.1 | 7344 | Wednesday, January 20, 2021 | Approved | |
MiKTeX (Install) 20.12.0.20210111 | 796 | Monday, January 11, 2021 | Approved | |
MiKTeX (Install) 20.12 | 19886 | Monday, December 28, 2020 | Approved | |
MiKTeX (Install) 20.11.0.20201119 | 6637 | Thursday, November 19, 2020 | Approved | |
MiKTeX (Install) 20.11 | 4662 | Monday, November 2, 2020 | Approved | |
MiKTeX (Install) 20.10.0.20201030 | 1460 | Friday, October 30, 2020 | Approved | |
MiKTeX (Install) 20.10.0.20201027 | 718 | Tuesday, October 27, 2020 | Approved | |
MiKTeX (Install) 20.10 | 2022 | Sunday, October 25, 2020 | Approved | |
MiKTeX (Install) 20.7 | 9114 | Saturday, August 8, 2020 | Approved | |
MiKTeX (Install) 20.6.29.20200727 | 186 | Tuesday, July 28, 2020 | Approved | |
MiKTeX (Install) 20.6.29 | 6628 | Sunday, July 19, 2020 | Approved | |
MiKTeX (Install) 20.6 | 88 | Sunday, July 19, 2020 | Approved | |
MiKTeX (Install) 2.9.7440 | 4312 | Tuesday, June 23, 2020 | Approved | |
MiKTeX (Install) 2.9.7269 | 38462 | Thursday, November 28, 2019 | Approved | |
MiKTeX (Install) 2.9.7152 | 26760 | Tuesday, August 6, 2019 | Approved | |
MiKTeX (Install) 2.9.7100 | 14369 | Tuesday, June 11, 2019 | Approved | |
MiKTeX (Install) 2.9.7031.01 | 9490 | Thursday, May 9, 2019 | Approved | |
MiKTeX (Install) 2.9.6942 | 7459 | Sunday, February 3, 2019 | Approved | |
MiKTeX (Install) 2.9.6813 | 7858 | Wednesday, September 19, 2018 | Approved | |
MiKTeX (Install) 2.9.6753 | 5885 | Saturday, June 30, 2018 | Approved | |
MiKTeX (Install) 2.9.6643 | 6132 | Monday, March 12, 2018 | Approved | |
MiKTeX (Install) 2.9.6615 | 2341 | Wednesday, February 21, 2018 | Approved | |
MiKTeX (Install) 2.9.6520 | 6822 | Thursday, November 9, 2017 | Approved | |
MiKTeX (Install) 2.9.6361 | 7796 | Saturday, June 3, 2017 | Approved | |
MiKTeX (Install) 2.9.6326 | 2554 | Saturday, April 29, 2017 | Approved | |
MiKTeX (Install) 2.9.6236 | 4076 | Sunday, January 29, 2017 | Approved | |
MiKTeX (Install) 2.9.6219 | 1542 | Thursday, January 12, 2017 | Approved | |
MiKTeX (Install) 2.9.6161 | 2428 | Tuesday, November 15, 2016 | Approved | |
MiKTeX (Install) 2.9.6069 | 367 | Monday, October 31, 2016 | Approved |
Copyright © 2006-2020 Christian Schenk
This package has no dependencies.
Ground Rules:
- This discussion is only about MiKTeX (Install) and the MiKTeX (Install) package. If you have feedback for Chocolatey, please contact the Google Group.
- This discussion will carry over multiple versions. If you have a comment about a particular version, please note that in your comments.
- The maintainers of this Chocolatey Package will be notified about new comments that are posted to this Disqus thread, however, it is NOT a guarantee that you will get a response. If you do not hear back from the maintainers after posting a message below, please follow up by using the link on the left side of this page or follow this link to contact maintainers. If you still hear nothing back, please follow the package triage process.
- Tell us what you love about the package or MiKTeX (Install), or tell us what needs improvement.
- Share your experiences with the package, or extra configuration or gotchas that you've found.
- If you use a url, the comment will be flagged for moderation until you've been whitelisted. Disqus moderated comments are approved on a weekly schedule if not sooner. It could take between 1-5 days for your comment to show up.